- Home
- Products
- Articles
- 4 Axis Robot Arm
- A Stepper Motor Driven Ferris Wheel (Version 3 Compiler required)
- An Update on Keith Cameron's Lift
- Automatic Tram Layout
- Bug in Increment Word Instruction
- Compiler Version Releases
- Industrial Arc Welding Robot
- MotorVating the Speed Play Robot
- Reproducing the Electronic Set Models
- Sensor Expansion Port Pinout Diagram
- Sheet 1 - Hardware from NZ 240 volt wall socket to...
- Sheet 3 Meccano Car model controlled by the MotorVator and Director.
- Sheet 2 - Hardware from Motor(s) to MotorVator®.
- User Input Options
- Version 3 Manual Released
- 16/32 Bit Maths Routines
- Build Your Own Photo Sensor
- Controlling Stepper Motors
- Magnetic reed switch as a non contact sensor
- MeccCompiler III Tutorial
- More Inputs and/or Motors: Port Replication
- More Inputs: the Sensor Expansion Port
- Square Root Function
- Tutorial: Rev Counter
- Use of the opto switch or opto interrupter as a ro...
- FAQ
Controlling Stepper Motors
With your MotorVator you can control Stepper Motors.
You need to use a BiPolar Stepper motor (that is, one with 4 leads, or a 6 lead unipolar Stepper converted to Bipolar mode).
For a primer in Stepper Motors, see http://www.cs.uiowa.edu/~jones/step/types.html
and
http://209.41.165.153/stepper/Tutorials/BiTutor.html
The key issue with Stepper Motors is current control - it is very easy to overheat them with too much current.
You can use a wide range of BiPolar Stepper Motors, but many stepper motors use low voltage but high current, so not suitable for MotorVator control.
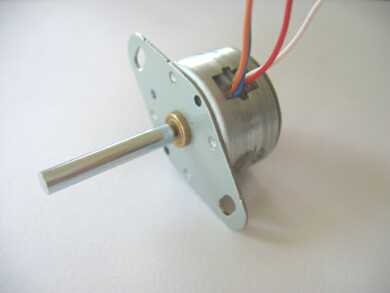
We (through MeccParts.com) offer a simple stepper (48 steps per revolution), matched to the MotorVator current driving capacity and able to be driven using anywhere from 6V to 12V without the need for current limiting resistors.
http://www.meccparts.com/catalog/prod ... bcc22830f8d13df5d97671ae9

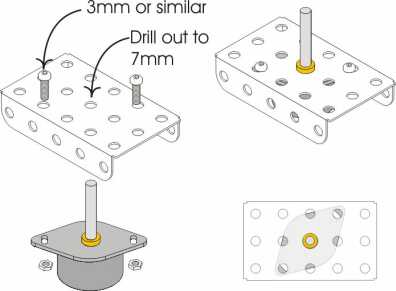
This stepper motor is easily mounted into the Meccano geometry, as it will fit diagonally across any 3x3 hole face:

To drive a BiPolar stepper motor, you will use two of the Motor Outputs - one for each coil. The Stepper Motor connects directly to the MotorVator - no need for additional control- or interface-boards.
Then it is a simple matter of powering both coils (i.e. using SetMotor command for both motors) in the correct combination of Forward and Back.
Coil 2 Direction                         Coil 1 Direction

	                F                                           F

	                B                                           F

	                B                                           B

	                F                                           B
	; to turn clockwise, move down the table
; to turn counterclockwise, move up the table
So the MotorVator code needs to set the two motors in the correct directions, wait (for the current to create the magnetic field in the coils), change to the next combination of motor directions, wait, etc.
Attached below is
(a) some sample code that handles this, for one motor.
(b) sample code that handles one or two stepper motor simultaneously.
Sample code to Drive one Stepper motor. Sample code (for MeccCompiler II) that will drive one stepper motor.
Sample code to run two steppers simultaneously. Operates one or two stepper motors.
When running two stepper motors, it scales the timing of the steps so that both movements finish at the same time. E.g. if one stepper is to move 48 steps, and the other only 12 steps, then the first will move 4 times as quickly as the second.
