- Home
- Products
- Articles
- 4 Axis Robot Arm
- A Stepper Motor Driven Ferris Wheel (Version 3 Compiler required)
- An Update on Keith Cameron's Lift
- Automatic Tram Layout
- Bug in Increment Word Instruction
- Compiler Version Releases
- Industrial Arc Welding Robot
- MotorVating the Speed Play Robot
- Reproducing the Electronic Set Models
- Sensor Expansion Port Pinout Diagram
- Sheet 1 - Hardware from NZ 240 volt wall socket to...
- Sheet 3 Meccano Car model controlled by the MotorVator and Director.
- Sheet 2 - Hardware from Motor(s) to MotorVator®.
- User Input Options
- Version 3 Manual Released
- 16/32 Bit Maths Routines
- Build Your Own Photo Sensor
- Controlling Stepper Motors
- Magnetic reed switch as a non contact sensor
- MeccCompiler III Tutorial
- More Inputs and/or Motors: Port Replication
- More Inputs: the Sensor Expansion Port
- Square Root Function
- Tutorial: Rev Counter
- Use of the opto switch or opto interrupter as a ro...
- FAQ
Tutorial: Rev Counter
A Step by Step Tutorial on MotorVator programming.
Using a simple test rig with a motor and a microswitch/cam arrangement, we will build up a program to measure and control the RPM of the motor.
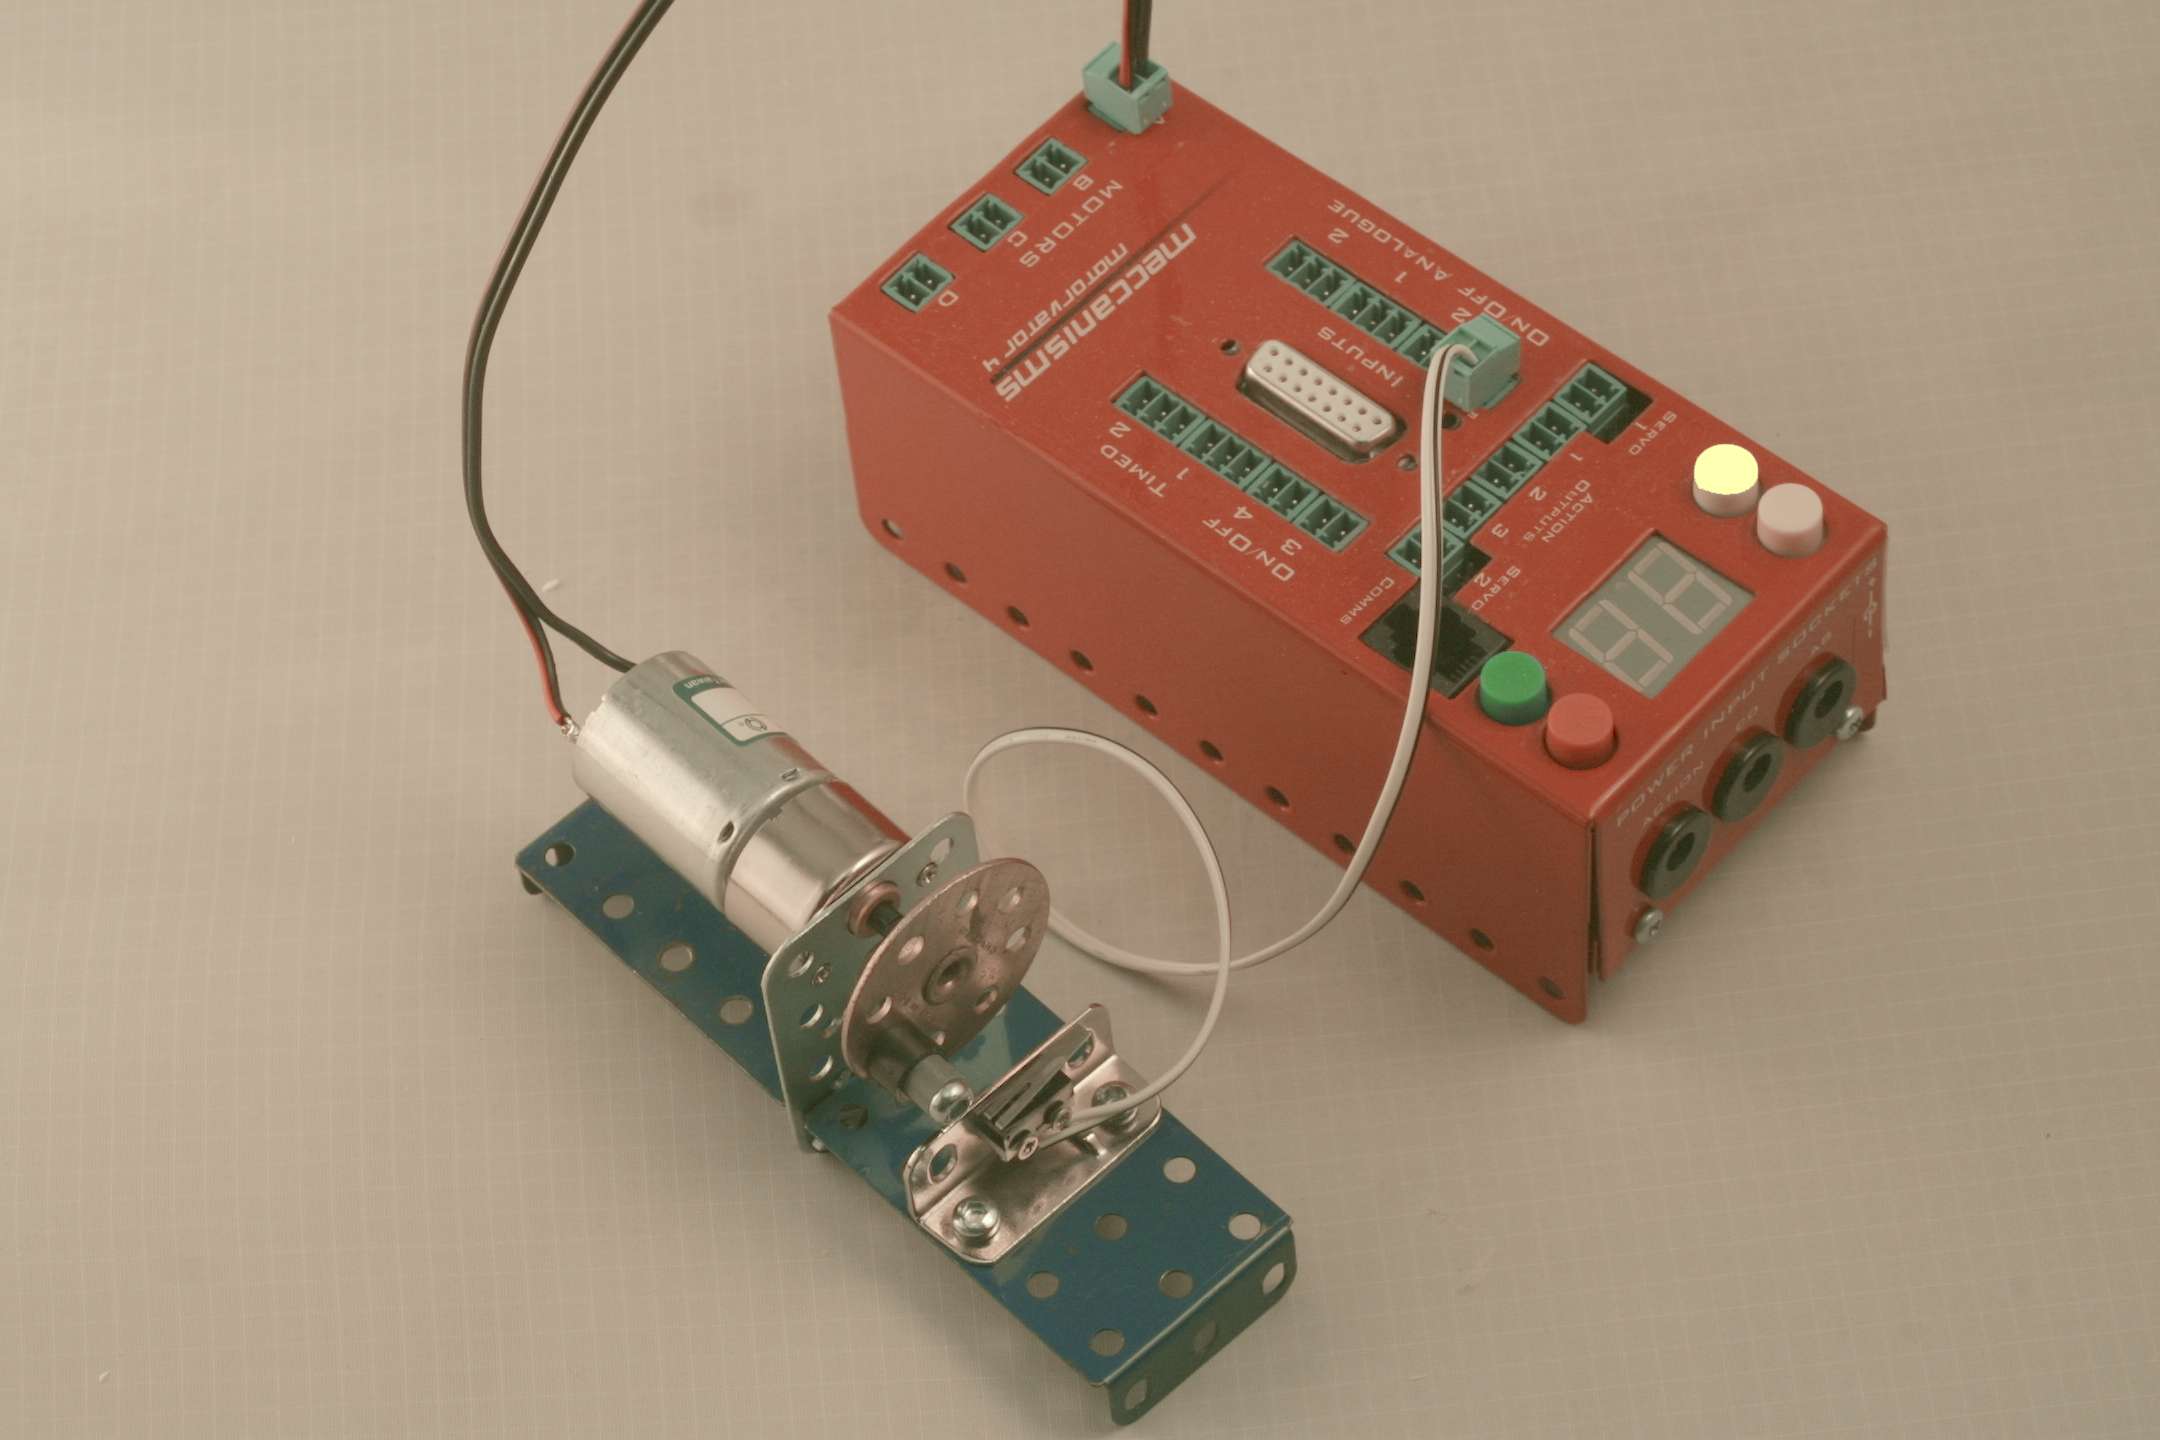
Our rig is built using the following parts:
- 1 x Meccanisms Microswitch Assembly, connected to OnOff Input 1
- 1 x Meccanisms HG040 40rpm Geared DC Motor, connected to Motor Output A
- 2 x Meccano 51 flanged Plates
- 1 x Meccano #24 Bush wheel, with a bolt/spacers to press the microswitch once per revolution.
However, you can build it any way you want, as long as the motor is controlled from MotorA output and a microswitch or contact is closed once per revolution. (note that the speed of the bush wheel can't exceed 100rpm, otherwise it will be going too fast to measure the RPM directly. If you are using a faster motor, you might need to include some stepdown gearing).
Now we'll build up from a simple program, adding new concepts as we progress. Download each program by Right-Clicking and "Save Target As".
|
Rev_Count1.txt
We will start the motor turning, then count the number of revolutions (number of times the microswitch is closed), until we get to 100, when we will stop. Important to note that we have to only count once per revolution, so we can't just increment (add 1 to) the counter if the switch is closed, because it will be closed for 100s of instructions. So we make sure that we only count if the switch is now closed, but was open last time we checked! This would be a useful starting point for say a model LIFT, where you wanted to raise the car a certain distance using the number of revolutions of the winding drum to measure for each floor. |
|
|
Rev_Count2.txt
We use the same code to start the motor and count the pulse. |
|
|
Rev_Count3.txt
Rather than have to wait for the 100 pulses, we calculate an RPM based on the time taken for 1 revolution. |
|
|
Rev_Count4.txt
Now that we can calculate the RPM, let's set a Target RPM and automatically adjust the motor speed until we are running at the RPM.
|
|
|
Rev_Count5.txt
Now let's allow the Target RPM to be adjusted up or down using the UP and DOWN buttons on the MotorVator. This requires us to implement some EVENT code.
|
|
|
Rev_Count6.txt
And finally, let's adjust towards the Target RPM more quickly, but changing the motor speed based on how far the current RPM is from the Target RPM. This is getting close to a standard feedback control system. |
Having complete these exercises, you might like to revisit the idea of the Model Lift.
Let's imagine that your model lift requires 30 revolutions of the winding drum to go from the ground floor to floor 9.
Could you change the program so that the lift started rising slowly, accelerated to a fast speed and then slowed down as it approached the 9th floor before stopping smoothly?
Suggestions:
Work out how quickly to accelerate.....for each pulse count, increase the speed by X until the maximum speed is reached.
Decide when to start slowing down (how many floors below the 9th - 30 pulse - should you start decellerating?).
You will want to be moving slowly just before the stopping point, to avoid a harsh stop and to avoid overrunning the position, but you don't want to be creeping up from the 7th floor.
Here is some suggested code: Lift Ground to 9th floor.txt
Now, how would you make this code more general, so that you could move from any floor to any other floor, yet still accellerate and decelerate elegantly?!
Next, work out how to implement Floor Call buttons (connected to other inputs), so that Lift car can be called to and from any floor!